• Home
  • Food for Thot
    • All Recipes
    • Breaky
    • Soups + Spoons
    • Snacks + Sides
  • Food Appropriation
    • Family Secrets
    • Fire Island
    • Mexican Night
    • Pizza Night
  • Get Baked
  • Sips
  • Eat Out
  • Cookbook Club
  • Cucina's Closet
  • Blog
  • About + Contact
  • Menu

The Queer Cucina

  • Home
  • Food for Thot
    • All Recipes
    • Breaky
    • Soups + Spoons
    • Snacks + Sides
  • Food Appropriation
    • Family Secrets
    • Fire Island
    • Mexican Night
    • Pizza Night
  • Get Baked
  • Sips
  • Eat Out
  • Cookbook Club
  • Cucina's Closet
  • Blog
  • About + Contact

ASIAN SLAW WITH GINGER-PEANUT DRESSING

May 25, 2018 in Food for Thot, Fire Island, Snacks + Sides

So I was making the Honey-Soy Broiled Salmon tonight and wanted to something crisp to go without. I have been making this recipe for years and every time I want to make it, I need to google it and dig into blogs I follow (This one is from “Once Upon A Chef“). 


It’s sometimes a little game for me trying to find the exact recipe I made. I should at least bookmark it…but then I forget…haha I am a mess. 


There are a few recipes I have lost completely, so I didn’t want this to be one of them. 


Jenn says it perfect on her site, don’t let the list of ingredients discourage you. Its just a lot of items, but most are store-bought and easy to throw together. The dressing is typical Asian ingredients, so you will most likely have these all in your pantry or on your menu already.


Ingredients:

For the Dressing

  • 1/4 cup honey

  • 1/4 cup vegetable oil

  • 1/4 cup unseasoned rice vinegar

  • 1 tablespoon soy sauce

  • 1 teaspoon Asian sesame oil

  • 1 tablespoon peanut butter (I used Justin’s…but you can use anything)

  • 1/2 teaspoon salt

  • 1/2 teaspoon Sriracha sauce (hell yes)

  • 1 tablespoon minced fresh ginger

  • 1 large garlic clove, minced

For the Slaw

  • 4 cups prepared shredded coleslaw (store bought)

  • 2 cups prepared shredded carrots (store bought)

  • 1 red bell pepper, thinly sliced into bite-sized pieces

  • 1 cup cooked and shelled edamame (they sell these in my produce section already cooked)

  • 2 medium scallions, finely sliced

  • 1/2 cup chopped salted peanuts 

  • 1/2 cup loosely packed chopped fresh cilantro

aacb1a_fdbe143d7c6f4340b96771c05561a618~mv2_d_3024_3024_s_4_2.jpg

Instructions

Make the dressing by combining all of the ingredients in a medium bowl. Stir until the peanut butter is dissolved. Set aside.


Combine all of the slaw ingredients in a large bowl.


Add the dressing and toss well. Let sit at least ten minutes so vegetables have a chance to soak up the dressing. Taste and adjust seasoning if necessary. 


Serve cold.

Print Friendly and PDF
Tags: Asian
aacb1a_76bfd9773f1a4ad484a083f909cd86df~mv2.jpg

SOME GRANDMA's CHOCOLATE CHIP BISCOTTI

March 04, 2018 in Get Baked, Family Secrets

"Biscotti," is Italian for "Twice Baked." And there you go, thats the recipe :)

Haha. I imagine someone's grandma in Italy is putting these out with some espresso or "demitasse" as it was called in our house growing up. I had to google demitasse to learn it's the French word for "half-cup." Have to love Italians using a French word - mind blown. I don't even know if my childhood was real now.

Ingredients

Makes at least (2) dozen, I tend to cut them thinner these days, so get more out of them.

  • 2 cups all-purpose flour

  • 1 1/2 teaspoons baking powder

  • 1/4 teaspoon salt

  • 3/4 cup sugar

  • 1/2 cup (1 stick) unsalted butter, room temperature

  • 2 large eggs

  • 1 cup semisweet chocolate chips

Flavor Variations:

  • Chocolate Orange - add 2 tsp Orange Extract in when beating eggs and stir in 1 cup diced candied orange peel

  • Matcha - stir in 2 TBLS of matcha powder with dry ingredients

  • Super Italian with Anise - 1 teaspoon ground anise seed added w/ dry ingredients

Instructions

  1. Preheat the oven to 350 degrees F.

  2. Line a baking sheet with parchment paper or use silicone mat (Silpat,etc). In a medium bowl, mix the flour, baking powder, and salt. Using an hand mixer or stand mixer, beat the sugar and butter in a large bowl to blend. Beat in the eggs 1 at a time. Add the flour mixture and beat just until blended. Stir in the chocolate chips.

  3. Form the dough into (2) horizontal logs on baking sheet - around 16" long and 2"-3" wide. I tend to form into log on baking sheet, then roll a bit with hands to form log. Spreading out till you get desired length. These tend to puff a bit and widen as they bake. So think about flatting the log a bit if you want that type of biscotti. Get wild haha.

  4. Bake until light golden, about 30 minutes. Cool 30 minutes.

  5. Place the logs on a cutting board. Using a serrated knife, cut the log on a diagonal into 1/2- to 3/4-inch-thick slices. Arrange the cookies cut side down on the baking sheet. Bake the cookies until pale golden, about 15 minutes. Transfer the cookies to a rack and cool completely.

Print Friendly and PDF
Tags: Cookie
aacb1a_879689bc2daa40f497786a40317f5878~mv2.jpg

LEMON BARS

March 01, 2018 in Get Baked

So it’s March and snowing here in NY…lucky us.


When I get snowed in, I suddenly forget about calories and the general health of anyone I am feeding. It’s time to bulk up. In between work emails and conference calls, one of my best friends (Joshy), is going through my collection of Food Network Magazine’s and picking out favorite recipes, scanning them and categorizing them for me.


Our house is very lucky to have Joshy, he keeps sh*t in check.


We stumbled upon this recipe from Paul Deen from the May 2013 Issue and it just so happens I had everything in house for this recipe.

I am looking out into the backyard and wishing it was time to break out the smoker, but figured no better way to get ready for spring than with some fresh Lemon Bars.


Ingredients:

For the crust:

  • 2 sticks unsalted butter, cut into pieces and at room temperature, plus more for the dish

  • 2 cups all-purpose flour

  • 1 cup confectioners’ sugar, plus more for dusting

  • Pinch of salt

For the filling:

  • 4 large eggs

  • 2 cups granulated sugar

  • 6 tablespoons all-purpose flour

  • 6 tablespoons fresh lemon juice

Directions

Preheat the oven to 350 degrees F. Line a 9-by-13-inch baking dish with aluminum foil and butter the foil.

Make the crust: Whisk the flour, confectioners’ sugar and salt in a large bowl.

Cut in the butter with your fingers to make a crumbly dough; press into the prepared baking dish.

aacb1a_57d0795b374843bebebd593a6f5e2c82~mv2_d_4032_3024_s_4_2.jpg aacb1a_40c64c967a2741dc92d43e317720fba7~mv2_d_3024_4032_s_4_2.jpg

Bake 20 minutes, then transfer to a rack and let cool slightly.


Meanwhile, make the filling: 

Mix the eggs, granulated sugar and flour in a bowl with a fork. Mix in the lemon juice. (I mixed in everything all at once, by accident – but no worries, still came out great).

aacb1a_a2cb662d68604489bf8884cd9d783a7c~mv2_d_4032_3024_s_4_2.jpg aacb1a_427be7f353d6496cadedea3a249c79f0~mv2_d_3024_4032_s_4_2.jpg

Pour the filling over the crust and bake 25 more minutes; transfer to a rack and let cool completely. 

Sprinkle with confectioners’ sugar. Lift out of the pan and cut into pieces.

Print Friendly and PDF
Tags: Lemon

MOM'S STUFFED MUSHROOMS

January 31, 2018 in Family Secrets, Food for Thot, Snacks + Sides

These were always a constant at family holidays. I remember not liking them as a kid, until I learned they were stuffed with breadcrumbs and cheese. Then I finally tried one and there was no going back. I was even more shocked when I learned the filling also contained the diced up mushroom stems. I have seen plenty of recipes that discard the stems and I am not sure why, they make the filing so f*cking good. Thank you mom for making mushrooms amazing.


Ingredients

  • 24 button mushrooms, washed and dried, stems removed & set aside

  • 2 Tablespoons Olive Oil

  • 2 garlic cloves, minced

  • 1/2 cup Italian seasoned bread crumbs

  • 1 bunch of Flat leaf parsley

  • 2 teaspoons of dried oregano

  • 4 Tablespoons of grated parmesan, or pecorino romano

  • 1/4 cup white wine 

  • 1-2 cups chicken broth (can use vegetable broth)

  • Salt & Pepper, to taste

Directions

Preheat oven to 350 degrees F. 

Dice/chop mushroom stems. You can do this by hand with knife, or pulse in food processor.

Heat olive oil over medium high heat in large frying pan. Add minced garlic to hot oil, sauté till fragrant (30 seconds). Add mushrooms stems, oregano, parsley, salt & pepper to pan. Sauté a couple minutes slightly cooking the diced stems.

aacb1a_5ae2ff1feda648fb9038faa6ff92b3fc~mv2_d_3024_4032_s_4_2.jpg aacb1a_7718138bf6d342eb8bbb51f2d6f144db~mv2_d_2250_2343_s_2.jpg aacb1a_515be86cc41042a586f0ca5607e4c2a4~mv2_d_3024_4032_s_4_2.jpg aacb1a_39fe5363eefc4261b42560d63c528ec6~mv2_d_2250_1432_s_2.png

Remove pan from heat, sprinkle with grated cheese, white wine, bread crumbs, mix well to bring all together. Taste for salt. Add as needed. 

With a spoon, fill the mushroom caps, place in baking pan. I use a pyrex dish. Add chicken broth to pan and cover mushroom caps in 1/4 to 1/2 of liquid. Cover with aluminum foil and place in oven.

aacb1a_39fe5363eefc4261b42560d63c528ec6~mv2_d_2250_1432_s_2.png aacb1a_e405d581bba841cf84d03335d1b63484~mv2_d_3024_4032_s_4_2.jpg aacb1a_39ed263f729a402e92fd0dd928b2b905~mv2_d_3024_4032_s_4_2.jpg aacb1a_dd59dafac3d84d81a5d4c56cd1d7f9ea~mv2_d_3024_4032_s_4_2.jpg aacb1a_eb6b81b6e44e4d5584d58cf457b726fb~mv2_d_3024_4032_s_4_2.jpg

Bake 45 minutes. Then remove foil and bake another 10-15 minutes uncovered. Timing varies on size of mushrooms. For smaller mushrooms bake for 30 minutes covered and 10 minutes uncovered. 

Print Friendly and PDF

SLOPPY NICKS [Turkey]

January 12, 2018 in Food for Thot, Fire Island, Family Secrets, Meals

Not sure who Joe is, but this is my rendition of the popular classic. This recipe has been in the working since 2005, but never got written down. The first homemade Sloppy Joe I had was while I was studying abroad in Australia where a pearl laden Michigan native housemate taught me the way. I will never forget her cooking this in our small dorm room in her finest pearls....making Sloppy Joes.


Ingredients [makes 6-8 sloppy nicks]

  • 3 lbs Ground Turkey

  • 1/2 yellow onion, diced

  • 2-3 Bell Peppers [mixed color], diced

  • 1 1/2 cups Ketchup

  • 1/2 cup bbq sauce

  • TBLS Worcestershire Sauce 

  • 2 tsp yellow mustard

  • 1 1/2 cups red wine (don't get too fancy, it cooks down)

  • 2 TBLS Olive Oil

aacb1a_5a8120a699b649f4b20dcc5d73d3e588~mv2_d_4032_3024_s_4_2.jpg

Directions

Add olive oil to large pot at medium high heat. Toss in diced onion and peppers; sauce 5-10 minutes, until they start to cook down and carmelize a bit. I am not a fan of raw onion in anything, so I really cook it down to almost hide it in the dish. Remove from pot and set aside in a bowl. 


aacb1a_a1a27fa704674fe0ac42d4e3492ab498~mv2_d_4032_3024_s_4_2.jpg aacb1a_c3dfd349d0b94daea7a24b1439bbdede~mv2_d_3024_4032_s_4_2.jpg aacb1a_ffe4b2a2d47d4dd1a73890df4fab0cdb~mv2_d_3024_4032_s_4_2.jpg

To pot, add ground turkey and season with salt & pepper. Do your best to break the meat up and brown it. Use the back of a wooden spoon, or even a potato masher to get into finer consistency. Once turkey is cooked through and no longer pink, add onion/pepper mix back in. 

aacb1a_eceaa3d65204457090a3c13c4ac1289c~mv2_d_3024_4032_s_4_2.jpg aacb1a_f218754234464d8992efd94e602bdc31~mv2_d_3024_4032_s_4_2.jpg aacb1a_b67670c0166f46218b64c2a990f13db6~mv2_d_3024_4032_s_4_2.jpg

Then add the ketchup, bbq sauce, Worcestershire sauce, mustard and red wine. Mix well and bring to somewhat of a boil, then reduce heat to low and let simmer for 15-20 minutes. You really want to cook it down till you get the right "sloppy" consistency. We have all eaten these before, so you should know what to look for, its not too runny, but messy enough. 

aacb1a_1a6a93b58fc74393a3d03665c3d3d7fb~mv2_d_3024_4032_s_4_2.jpg

Towards the end I needed to put mine on high heat to cook off the liquid and get it to the right consistency. If it gets too thick, add a little water and if its too thin, you can always add some cornstarch to bind it a bit. Taste it for the right tanginess. You can always tweak to your liking. I have noticed sometimes that I need to add a little more yellow mustard to get the right amount of tanginess. You will know what I mean when you taste it.

Transfer meat to buns. In this case, I also topped them with shredded pepper jack cheese and served them on brioche rolls. A hamburger bun works perfectly fine.

Enjoy. 

Print Friendly and PDF
aacb1a_2781801f2713465b95f2f966cf33620b~mv2_d_4032_3024_s_4_2.jpg

MOM'S PAN FRIED CORNISH HENS

January 08, 2018 in Food for Thot, Family Secrets, Meals

One of my favorite meals growing up and today: My mom’s pan fried Cornish hens. These were always a treat growing up. I know they were a lot of work, because my mom was always manning the pan and slowly turning each piece by hand so that each one equally browned. I am always shocked at how much flavor this dish brings with just bay leaves, salt & wine.

This creates some of the best pan juice I know if.

Grab that bread. 


Ingredients

  • 2 Cornish Hens [thawed fully if using frozen] 

  • 1/2 cup extra-virgin olive oil

  • 6-8 Dried Bay Leaves

  • 1/4 cup good white wine [used Pinot Grigio here]

  • Salt & pepper

Directions

Rinse & pat those Cornish hens dry. Place on cutting board and get ready to cut down into smaller pieces. I used some amazing new meat shears I got, but you can do this with a nice cleaver. 
Salt & pepper both sides of the cut up chicken. I did this all in a sheet pan because it was the perfect size for this. 

aacb1a_ee528be35f5b42d5bb19c722c4ea254e~mv2_d_4032_3024_s_4_2.jpg aacb1a_1d90778a523c44f6b235d5d01eff1b9d~mv2_d_3024_4032_s_4_2.jpg aacb1a_2f04603484974eafb8dce63768c31b38~mv2_d_3024_4032_s_4_2.jpg

Heat 1/2 cup oil in large pan. Test oil for readiness by slowly taking a piece of chicken with tongs and slowly place in oil, if it sizzles, then start placing chicken in oil. Lower heat to medium/high.


Fry in oil 10 mins till slightly golden on side, turn over and start browning other side. You'll start to see the chicken brown....you're on the right track. 

Once chicken starts to brown on both sides, add in bay leaves and work into oil to make sure bay leaves begin frying in oil. Fry an additional 10 mins.

Turn chickens frequently in oil until golden all around. 

Lower heat and slowly pour white wine into pan. 

Cook an additional 5 minutes, turning chicken frequently to baste into oil/wine mixture. Remove from heat. 

aacb1a_14b6b82b836641ee88930526c945e20d~mv2_d_4032_3024_s_4_2.jpg aacb1a_e4b5ea47ae8e42ab859aab961e448dd9~mv2_d_4032_3024_s_4_2.jpg

Serve directly from pan with a spoon, because you will want to soak up all the pan juices.

Print Friendly and PDF

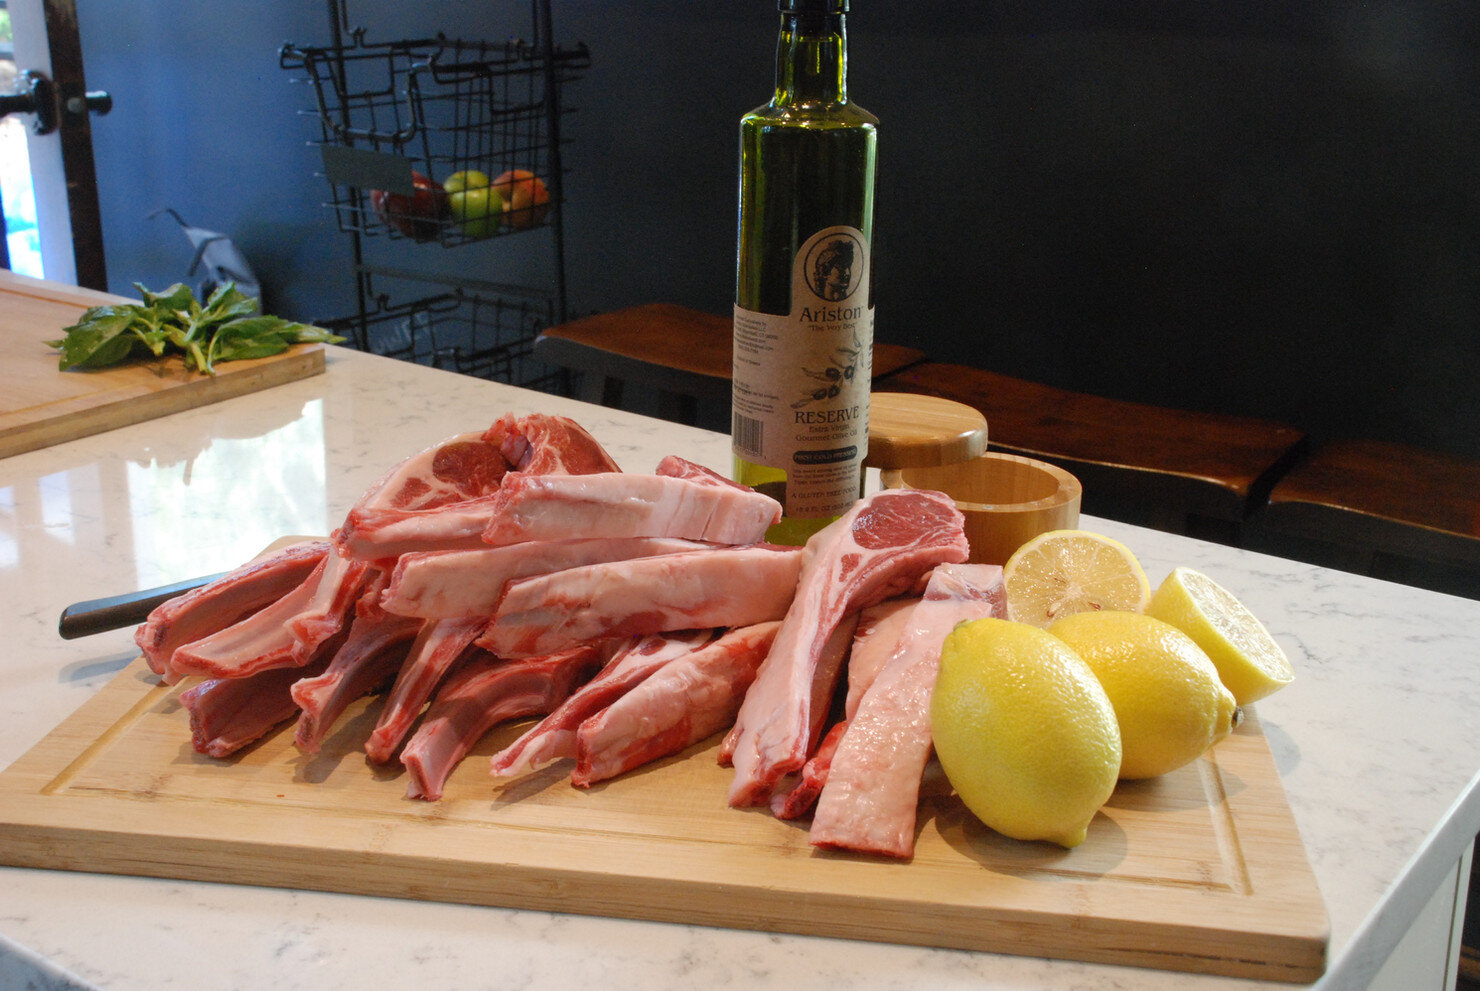
GRILLED BABY LAMB CHOPS W/ LEMON

January 04, 2018 in Food for Thot, Fire Island, Meals, Snacks + Sides, Family Secrets

This one is pretty simple and quick. Don’t need to go getting crazy to make lamb taste good, its just sooo good on it’s own. You can serve this an entree or an appetizer. I bought these @ Stop & Shop (local grocery store) because it’s less than a mile away and I didn’t feel like dealing with Costco. 


I LOVE Costco and you can’t beat their pricing for lamb chops, but you need to mentally be prepared to go there, and I wasn’t.


I can’t go there for one thing, I try all the time, but it never works….never. Even if you bet me, I couldn’t do it. I need the things I buy there…need them all.

Ingredients

  • 3 lemons, halved

  • 1/2 cup extra-virgin olive oil

  • 16 baby lamb chops (2.5 to 3 pounds)

  • Kosher salt

Directions

On a rimmed container or even a ziplock bag, combine olive oil,  juice of 2 lemons with lamb chops. Sprinkle with salt.

aacb1a_19e5010bd72649fd8cff619a79c1162c~mv2_d_3872_2592_s_4_2.jpg

Mix all around with your hands, make sure to evenly coat each lamb chop. Don’t be shy with the salt Slice the last lemon and place on top of lamb.

aacb1a_bc7f55e71d81457397b547925625def9~mv2_d_3872_2592_s_4_2.jpg

Cover and let marinate at room temperature, turning occasionally, about 1 hour, but are great after just 15-20 minutes. 

Preheat a grill – charcoal, propane or even a grill pan/skillet on the stove. I am using propane. I am in desperate need of a new grill and its more of a “searing” grill because it cooks @ massively high temps – it often flares up and I am too lazy to buy some new parts…I love it, it crisps these up nice.


Look at those flames…wtf am I thinking….but those grill marks….F yes.

Grill the chops and lemons until browned, 3 to 4 minutes per side. Serve the chops topped with the lemons.

Print Friendly and PDF
aacb1a_48fb714158b448a99722b4d62bbb9669~mv2_d_4032_3024_s_4_2.jpg

CORN SOUFFLE

January 04, 2018 in Food for Thot, Family Secrets, Snacks + Sides

Really trying to kick off the New Year right and posting some of my favorites. This has been a constant in my life, it’s one of those side dishes that is always a crowd pleaser. I don’t know where this one originated, but I assume Paula Dean was not far from whoever made this recipe up.

Ingredients:

  • 1 (8oz) Box of Jiffy Corn Muffin Mix

  • 2 eggs

  • 1 stick of melted butter

  • 1 can of corn (drained)

  • 1 can of cream of corn

  • 8oz. Sour Cream

aacb1a_ccc1cac8fdfe49aab6fd0bb9c07ba803~mv2_d_4032_3024_s_4_2.jpg

Preheat oven to 400 degrees. Spray a pyrex dish or corning-ware with Pam.

Mix all together in large bowl, pour into baking dish.

Bake 50 minutes, until golden. Insert toothpick in middle to make sure fully cooked.

Print Friendly and PDF
aacb1a_ae66187ce22a473bb12ffd4ae0c1c1ac~mv2_d_3637_3022_s_4_2.jpg

“WAFFLES OF INSANE GREATNESS”

January 04, 2018 in Food for Thot, Meals, Get Baked, Breakfast

The name says it all. The recipe is courtesy of an episode of $40 a day w/ Rachel Ray on Food Network. I remember watching this episode and drooling over these. I usually double the recipe since ya never know whose here for breakfast and I rather have more than less.

Ingredients:

  • 3/4 cup all-purpose flour

  • 1/4 cup cornstarch

  • 1/2 teaspoon baking powder

  • 1/4 teaspoon baking soda

  • 1/2 teaspoon salt

  • 1 cup whole milk or buttermilk

  • 1/3 cup vegetable oil

  • 1 egg

  • 1 1/2 teaspoons sugar

  • 3/4 teaspoon vanilla extract

  • Butter and syrup, for serving

Directions

In a medium bowl, combine the flour, cornstarch, baking powder, baking soda, and salt; mix well.

Add the milk, vegetable oil, egg, sugar and vanilla and mix well. Let the batter sit for 30 minutes

Preheat a waffle iron. Do not use non-stick spray on the waffle iron; the oil in the batter will allow the waffle to release easily. Follow the directions on your waffle iron to cook the waffles.

aacb1a_8a1c507a284c4c128afbc12d810b1044~mv2_d_3024_4032_s_4_2.jpg aacb1a_5734187f44934f41864bf7b5e6e4745b~mv2_d_3024_4032_s_4_2.jpg aacb1a_eee833b9a4f94c38988f8723992012bc~mv2_d_3024_4032_s_4_2.jpg

Serve immediately with butter and syrup.

Print Friendly and PDF
Tags: Breakfast
aacb1a_1b1c59df51a34326b2f3b9404d9b0cd6~mv2_d_2448_2448_s_4_2.jpg

MOM’S TOMATO & CELERY SALAD

January 02, 2018 in Family Secrets, Food for Thot, Snacks + Sides

Growing up any nationality I am sure you have you staples that will always remind you of childhood, but this is one of mine, growing up Italian.


Everyone in the family grows celery. It started with my Nonni in the Bronx, who had a garden that you would have had to see to believe. Now my parents grow celery and all the aunts grow it too. For one reason only…this salad.


Ingredients:

  • A few stalks of leafy celery, the leaves are critical (2 cups worth chopped)

  • A handful of ripe tomatoes (2 cups worth diced)

  • 4 TBLS of Oil (I used Mazola, but you can use anything light)

  • Salt to taste

  • Water

  • Italian Bread

Make sure to wash the celery very well, since you are going to be using the leaves, sometimes its hard to see how dirty they actually are. Once clean, chop the celery into small rough pieces. Make sure to rough chop the leaves as well.


Dice up the tomatoes as well, into small pieces, it really doesn’t need to be perfect, its going to taste delicious.

Add the diced tomato and chopped celery to a medium bowl, the bowl you plan to serve this in works just fine, one less bowl to wash.

Ok, so the secret tool here, like every Italian mother and grandmother know…your hands. Crush some of the tomatoes in your hands to release some of the juices.

I didn’t take a picture of me doing this, so of course I go to google images and found this gem.

I guarantee you that this salad is not this much fun to make, so I am not sure what Giada is making here…

Ok, now back to reality. Add the oil, salt and a few TBLS of water to the mixture. Give a good stir to mix through. Taste for salt, the liquid should be addicting. Adjust as needed, also want to make sure you have enough juice for bread dunking, so add oil and water as needed.

Thanks Mom. Or should I say thanks Nonni.

aacb1a_b86429efd23b45de95f3b638e4323eb0~mv2_d_2448_2448_s_4_2.jpg
Print Friendly and PDF
Tags: salad
aacb1a_644179e30fd34cf5bb82c8b1a6dd50c1~mv2_d_2448_2448_s_4_2.jpg

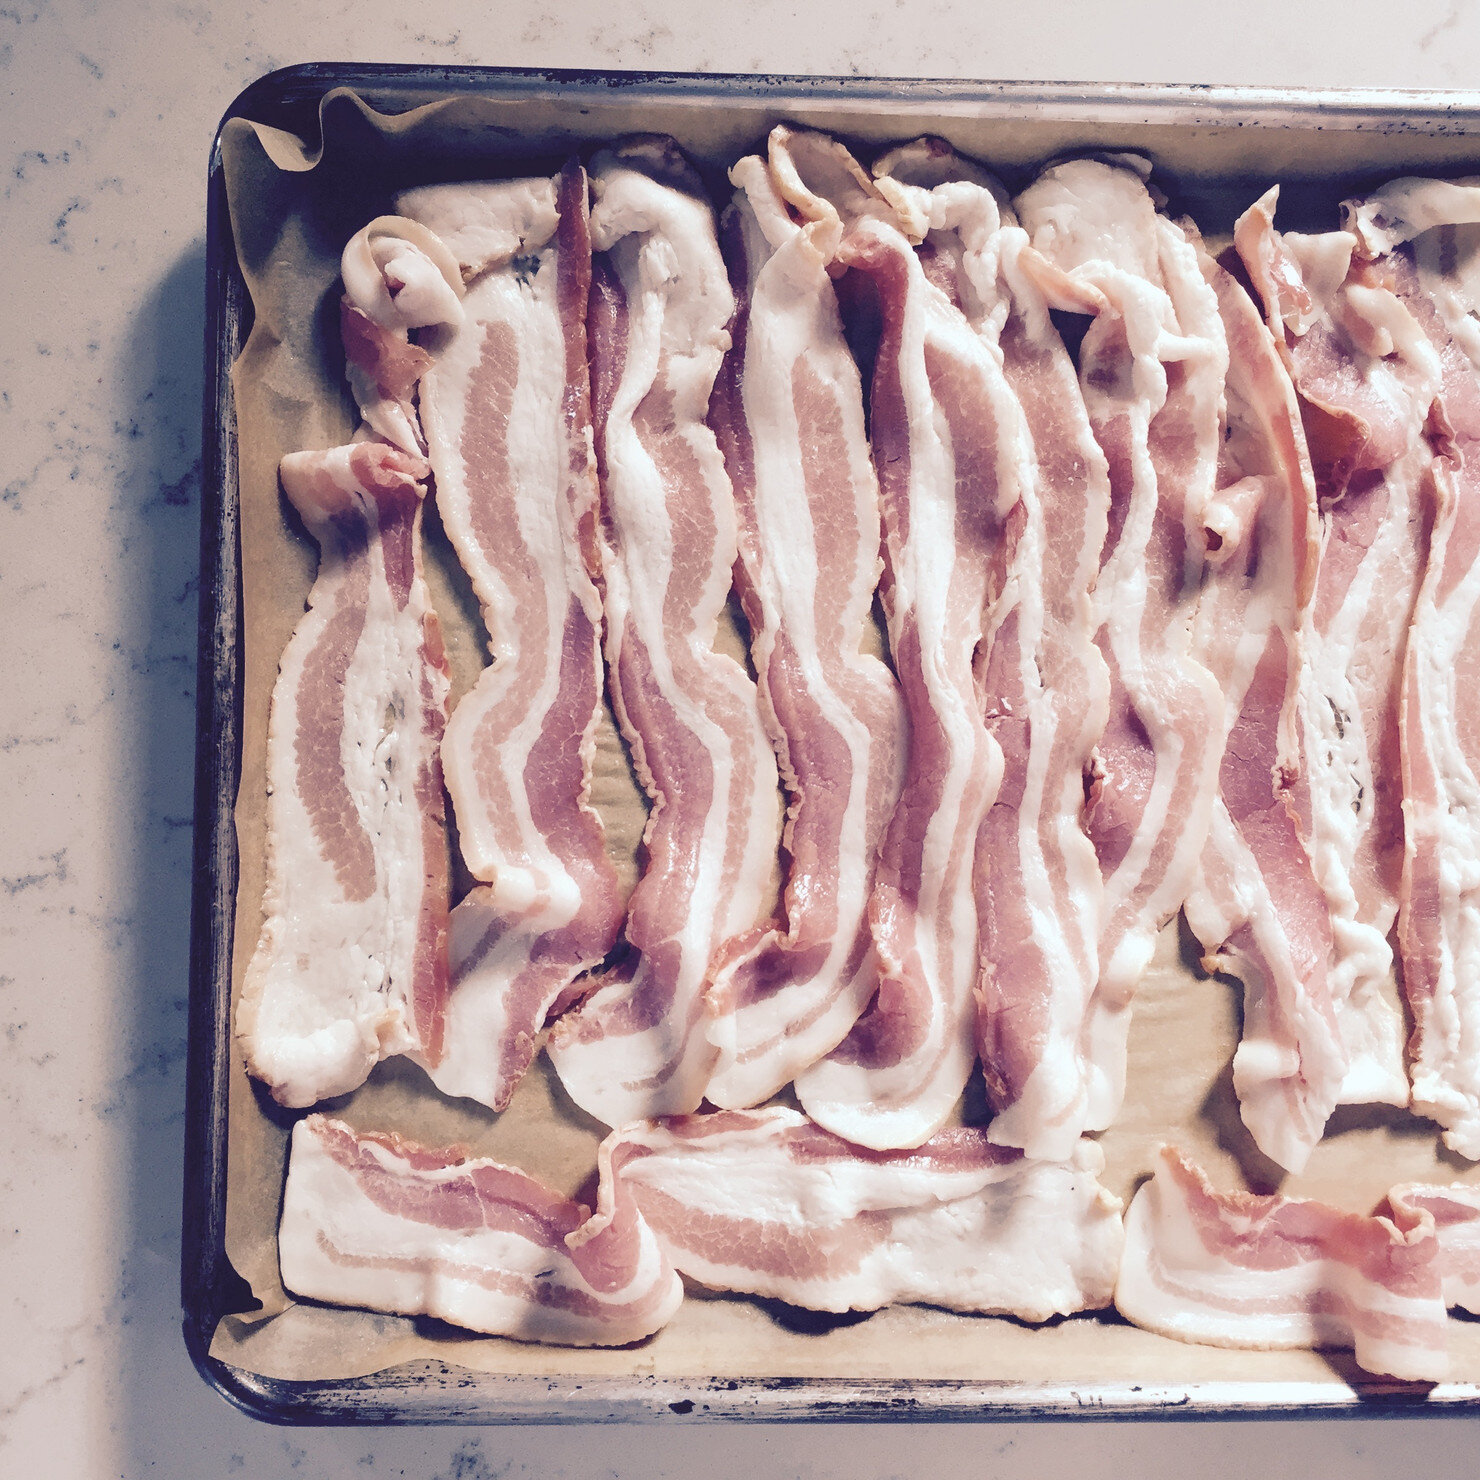
THE ONLY WAY TO MAKE BACON (OVEN ROASTED)

January 02, 2018 in Fire Island, Snacks + Sides, Family Secrets, Breakfast

This is the only way I cook bacon. I know I consume more bacon than the average person. I buy in bulk from Costco – can’t beat the deal…it’s like (5) lbs of bacon for under $10.00. I splurge sometimes for other bacons, but you can’t go wrong with Kirkland Brand, especially if you eat it as much as we do.

Ingredients:

  • 1 lb Bacon

  • Parchment Paper

  • Rimmed Baking Sheet (This is a MUST)

Directions:

  1. Preheat oven to 400 degrees Fahrenheit.

  2. Place a sheet of parchment paper on a sheet pan, cut to shape.

  3. Lay bacon out on parchment lined RIMMED baking sheet.

  4. Bake for 15 to 20 minutes until the bacon is really crispy.

  5. Drain on paper towels and serve.

Oh yea and I also save all my bacon grease. I store it in a jar and keep in fridge…ya just never know when you are going to need to add some bacon grease to a meal. I like to sneak it in.

aacb1a_b177e12d9b654bb591c0801c8222268a~mv2_d_3264_2448_s_4_2.jpg
Print Friendly and PDF
Tags: Breakfast
aacb1a_db88c2ab3f554bcba72fffdb45cf672d~mv2_d_3264_2448_s_4_2.jpg

GRILLED MEXICAN EGGPLANT

January 02, 2018 in Food for Thot, Snacks + Sides, Mexican, Fire Island

I am Italian, but love cooking with different spice palates. As long as you know the basic combo of spices that go into a certain type of food…you can add a flare to anything. I had bought some eggplant, no idea why…like I really have no idea what I was going to do with it, but I found it in my fridge…almost forgot about it. 

I decided to “Mexican-Ize” it. Donald Trump would not approve…but who gives a crap..he will never eat my food.

Fire up that grill!

Ingredients:

  • 1 Large eggplant, trimmed and cut into 1/2 inch thick rounds

  • 1 teaspoon of dried Oregano

  • 1 teaspoon of Cumin

  • 1 teaspoon of Chili Powder

  • 3-4 Tablespoons of oil (I used Avocado oil, but corn oil is fine)

  • Kosher salt

Directions:

Prepare a medium-high charcoal or gas grill fire. Toss the sliced eggplant into a bowl or ziplock. Add all the ingredients (salt, oil, cumin, chili powder and oregano). Mix well to make sure the spices get distributed evenly. Add more oil as needed if it looks dry…eggplant is absorbent, but don’t overdo it.

Grill (covered on a gas grill; uncovered on a charcoal grill) until golden-brown grill marks form, 3 to 4 minutes. Turn the eggplant and grill until tender and well marked on the second sides, 3 to 4 minutes more. The interior should be grayish and soft rather than white and hard. Serve warm or at room temperature.

I ended up cutting these in half to serve them, but you can easily leave them whole. They are certainly easier to grill whole.

Print Friendly and PDF
Tags: BBQ
file.jpg

PUMPKIN BREAD W/ BUTTERSCOTCH & CHOCOLATE CHIPS

January 02, 2018 in Get Baked

I love the fall, one of the best parts of living in the North East. Leaves are just starting to change and the shelves are stocked with pumpkin, might be a little overkill right now…but still gets me in the mood to cook for the season. 

This is an annual fall treat for our house. Enjoy

Ingredients:

  • 1/2 cup (1 stick) butter, softened

  • 1 pkg. (8 oz.) Cream Cheese, softened (I only use Philadelphia brand)

  • 2-1/2 cups sugar

  • 4 eggs

  • 1 can (15 oz.) pumpkin

  • 3-1/2 cups flour

  • 2 tsp. baking soda

  • 1 tsp. salt

  • 1 tsp. ground cinnamon

  • 1/2 tsp. Baking Powder

  • 1 cup of butterscotch chips

  • 1/2 chocolate chips

  • *can substitute the butterscotch and chocolate chips for pecans, walnuts, anything you want 

Heat oven to 350°F. Beat butter, cream cheese and sugar in large bowl with mixer until well blended. Add eggs, 1 at a time, mixing well after each addition. Blend in pumpkin.

Gradually add combined dry ingredients, mixing after each addition just until moistened. Pour into 2 greased and floured 9×5-inch loaf pans. Stir in butterscotch and chocolate chips (or other mix-ins).

Bake 55 min.or until toothpick inserted in centers comes out clean. Cool 5 min.; remove from pans to wire racks. Cool completely.

Print Friendly and PDF
aacb1a_479ac6fcc76443ec8dd568702309b1cc~mv2_d_3264_2448_s_4_2.jpg

ROASTED TURMERIC CILANTRO CAULIFLOWER

January 02, 2018 in Food for Thot, Fire Island, Mexican, Snacks + Sides

Seems like everyone is re-inventing cauliflower these days. Who would have thought it was so good. I grew up having it fried in batter…because Fran (mom) loves to whip up a delicious flour & water batter and fry just about anything. I will make sure to post some pics & recipe.

Ok so there are really no limits with cauliflower…I even make pizza out of it. I brush my teeth with it too….joking…but seriously there isn’t much you can’t do with it.

I also am a huge fan of Turmeric. Don’t be scared of it…its common in Asian food. I used to avoid it…because I never knew what it was…then I went balls to the wall with it and never looked back. If you don’t have some, add it to the list.

Word to the wise….be prepared for your hands to be yellow…it does leave an “afterglow” – aka can stain thing easy – just make sure to clean it up quick.

Ingredients:

  • 1 head of Cauliflower (I used 3 – because I cook for so many people)

  • Handful fo cilantro (Chopped)

  • 2 teaspoons of Turmeric

  • 2 teaspoons of salt

  • 2 Tablespoons of oil (I used Avocado oil, but corn oil is fine)

  • pinch of Red Pepper Flakes (optional)

You’ll notice I didn’t have fresh cilantro because someone at my grocery store clearly doesn’t know what they are doing! How could you be out of cilantro…it should be illegal. I keep some frozen just in case…screw the bomb shelter…all I need in case of an emergency is cilantro.

Instructions:

  1. Preheat oven to 450F – yea it’s high…but you’ll see how CRISPY it gets

  2. Break off florets from the head

  3. Combine the cauliflower florets with the oil, salt, turmeric

  4. Place in roasting pan and spread evenly

  5. Bake for approx 30 minutes – this is depending on your oven. You want to check it frequently and with an oven mit, give the pan a giggle every now and then…make sure its golden & fork tender

  6. Finish with fresh cilantro

I placed the frozen herbs in prior to roasted, but if using FRESH cilantro…which I hope you do. Then you can toss it in at the end after roasting.


People think I am crazy, but 450 is my favorite temperature for roasting…it’s WAY too high if you cant constantly watch the food – so I would recommend lowering temp if you want to relax a bit.

See how nice and brown that cauliflower is? Enjoy…I can smell this now…its amazing.

Print Friendly and PDF
aacb1a_14d80d3cb66240b89bae9f9437317b0b~mv2_d_3264_2448_s_4_2.jpg

GRILLED JUICY TURKEY BURGERS (W / ZUCCHINI)

January 02, 2018 in Food for Thot, Fire Island, Meals

I love reading food blogs and cookbooks. It’s the story that keeps giving. I know I may sound crazy, but the same way you can fall in love with characters in novels – I fall in love with recipes. They tell a story.


I plan to do some more cookbook / blog reviews and who knows, one day maybe meet these people…


One I can’t get enough of right now is:  Skinnytaste, the site is unreal for anyone, regardless of food restrictions, she (Gina Homolka) has something for everyone. She also came out with a cookbook that is the real version of “food porn.”


Seriously buy it now. You won’t be disappointed. I mean it…stop reading, and go to Amazon. Here is the link: The Skinnytaste Cookbook. But then come back.

aacb1a_36aad81611d0482487a2c62be151edad~mv2_d_2448_2448_s_4_2.jpg


The recipe tonight came from her blog, that I have modified a few ways and it always comes out delicious, so its super versatile – depending on what you like. It’s a solid base that you can add to and make your own.


I used to always eat turkey burgers because it was a compromise for me, I was trying to watch what I was eating (literally watching it go into my mouth) and avoid beef burgers, but eat turkey…it was usually dry and boring. 


Somehow Gina figured out God’s gift to dry turkey burgers: ZUCCHINI


The best turkey burger I have ever had and now all other turkey burgers are ruined going forward.


Ingredients:

  • 5 oz grated zucchini (when squeezed 4.25 oz)

  • 1 lb ground turkey

  • 1/4 cup seasoned whole wheat breadcrumbs – can also use gluten free or regular

  • 1 clove garlic, grated (optional) – I omitted this 

  • 1 tbsp grated red onion (optional) – I sometimes include this and sometimes don’t

  • 1 tsp kosher salt and fresh pepper

  • oil spray

  • Add in’s: you can stir in other items I’ve tested that come out great (black beans, roasted peppers and corn are just a few I tried)

Directions:

Squeeze ALL the moisture from the zucchini with paper towels. In a large bowl, combine ground turkey, zucchini, breadcrumbs, garlic (optional), onion (optional), salt and pepper. Make 5 equal patties, 4 1/2 ounces each.


Shredded zucchini -use a few paper-towels to press the water out.

aacb1a_7246d95c69664e2182a080e6df201e96~mv2_d_2448_3264_s_4_2.jpg

To cook indoors: Heat a large nonstick skillet on high heat. When hot, lightly spray oil. Add burgers to the pan and reduce the heat to low. Cook on one side until browned, then flip. Flip over a few times to prevent burning and to make sure the burgers are cooked all the way through.

If grilling: Clean grill well before cooking and spray with oil spray to prevent sticking. Cook the burgers on medium heat about 5 minutes on each side, or until no longer pink in the center.

You can easily eat these on a bun just like a burger with all the fixins, but I prefer to eat them bun-less with hot sauce and sliced avocado.

As I am writing this, I just remember I have a handful I need to freeze. I have made these in advance before and refrigerated them for a trip to Fire Island and cooked them when I got there.

I have a few in the freezer too, so I am always ready to go. Buy that Cookbook!

Print Friendly and PDF
Tags: BBQ
aacb1a_e352991d66ea49bc96c5896b7d7f5ab6~mv2.jpg

NAVY BEACH MONTAUK, NY

January 01, 2018 in Eat Out

It’s that time of the year again; my families annual vacation to The End, also known as Montauk. Located at the very tip of Long Island, NY, lays this quaint surfer town that has somehow kept its traditions intact. It’s the site of the largest commercial and recreational fishing fleet in New York State and the first lighthouse in the state. The best part about Montauk is that town zoning regulations forbid hotel/food chains. This may be the perfect recipe for creating great restaurants. The locals are fortunate to eat here all year round, but for me, it needs to all get done in a week.


My family has it down to a science, we know exactly where we want to eat, what nights, with who and what time. We know the in’s and out’s of how to book a reservation, what time to call, who doesn’t take them and we’ve even gone as far as baking cookies for the hostess to get a table. I mean, its ridiculous, but we take food very seriously. I could skip the sun and beach and just eat here all day.


A delightful surprise for me was venturing to a newly opened up restaurant, Navy Beach. Please take note that it’s very rare for us to try a new Montauk restaurant in it’s infancy, we need to make sure to check with our local friends first, to see if they give it the thumbs up, its like taking a car for a test drive. My cousin Anna also read a good review about this place and booked it for us, so 9 people deep, we showed up to taste as much as we could and then decide if this would be a keeper.


The location is a little hard to find, but worth the adventure, just take find Second House Road and follow the signs. The restaurant is located on a 200 foot private beach and is full of lounge chairs and picnic tables, for people to eat and grab some drinks. Its a popular spot to come to watch the sunset.

The drinks are worth the trip alone. We had ordered the Madoff which changes frequently, so you’re really never sure what you’re going to get. The night I went, it was a mixture fresh raspberries, vodka, St. Germaine, and sweet vermouth.

The menu features everything from cebiches to fried buttermilk chicken. A few highlights I need to point out:

  • Truffle Mac & Cheese / Mexican Corn you need to order for the table to split, they’re so good

  • Seafood & Chips  lightly battered and fried shrimp /  cod / scallops

  • Pan Roasted Salmon “ w/ garlic noodles & tamarind glaze

  • Buttermilk Fried Chicken “ w/ cheddar jalapeno cornbread

  • Navy Burger – onion bacon marmalade / cabot cheddar / hand-cut fries / house pickles

The Burger was one of the best I have ever tasted and the fried chicken was incredible.

Surprising to say this in a town known for its seafood.

aacb1a_a2ef1a258498423395119c09b87b9274~mv2.jpg

Restaurant Info:

Navy Beach

16 Navy Road

Montauk, NY 11954

(631) 668-6868

http://navybeach.com/restaurant/


Print Friendly and PDF
aacb1a_435ceea03f0a4fcb8aa125833f61196e~mv2.jpg

RED HAT BISTRO IRVINGTON, NY

January 01, 2018 in Eat Out

Located on the Hudson River 30 minutes outside NYC, is the picturesque and nostalgic Red Hat Bistro. 


The former location of the Lord and Burnham Company, a noted American green house manufacturer and builder of major public conservatories in the United States. 

The factory has now been converted and the restaurant is housed in what used to be the boiler room. The smoke stack with the Lord & Burnham initials protrudes out of the building and the combination of glass and brick maintains the industrial feel.


The Red Hat offers patio dining which gives you views of the Tappan Zee bridge and all the way south to Manhattan. In the warmer months, you can enjoy the trendy/chic rooftop terrace which features a full service bar and teak lounge chairs.

The menu is bistro style and features local seasonal ingredients. Constantly updated with the seasons, the menu is perfectly paired with the atmosphere and signature cocktails.

Appetizers: Pictured above to the right is the Red Hat salad, with imported burratta cheese, haricots verts, cherry tomato confit, cerignola olives, toasted croutons in a sherry-basil vinaigrette. In the upper left corner is the House-made Gnocchi, made with sheeps milk ricotta, topped with shitake & cremini mushrooms and asparagus, finished off with toasted herb breadcrumbs.

aacb1a_20aca6a0a6134e1e975ebe88cbe71fa9~mv2.jpg


Entrees: Pictured to the left is Grilled Atlantic Salmon, with asparagus and roasted fingerling potatoes, served on top of a pommery mustard-shallot vinaigrette. Grilled Swordfish pictured on the upper right with braised artichokes, spring vegetables in a lemon-saffron broth with pearl couscous.

The full menu can be found here: MENU

Restaurant Info:

Red Hat Bistro

1 Bridge Street

Irvington, NY 10533

(914) 591-5888


Print Friendly and PDF

LOOSEN BROS. “DR.L” RIESLING 2008

January 01, 2018 in Food for Thot, Drinks

I have just recently been exploring German Rieslings and realize that they all aren’t just sweet, sugary syrups. I subscribe to a local wine stores email list and one of the writers for them, loves German wines. In one of his June letters, he mentions the Mosel region, which specializes in dry wine.

Because of the northerly location of Mosel, the Riesling wines are often light, low in alcohol, crisp and high in acidity, and often exhibit “flowery” rather than “fruity” aromas.

Now, here I am a month later and we go to the wine store to find something that can be paired with Indian food, I am handed this Riesling, which just so happens to be from the Mosel region. Coincidence? Who knows, but the Chicken Tikka Masala went perfect with this wine and as I sit here and type, I want Indian NOW!

Dr. L comes exclusively from traditional vineyards with steep slopes and slate soil. The estate has been in the same family for over 200 years. When Ernst Loosen (pronounced loh-zen) assumed ownership in 1988, he realized that with ungrafted vines averaging 60 years old in some of Germany’s best-rated vineyards, he had the raw materials to create stunningly intense, world-class wines.

Average price for a bottle is $10.00, how could you go wrong?

Print Friendly and PDF
Tags: Wine

ST MICHAEL-EPPAN PINOT GRIGIO 2008

January 01, 2018 in Food for Thot, Drinks

This Pinot Grigio comes from the St. Michael-Eppan winery, situated along the Wine Route and is considered one of the best wineries in Italy.

Since 1977, Hans Terzer, Master Winemaker of the Winery, has been regarded as one of the most respected connoisseurs of white wine in Italy. The Gambero Rosso, Italy’s prestigious wine guide, named him one of the Best Ten Master Winemakers in the World.

The Vineyards website describes it as: Light green luster’s run through the straw color of this wine whose aroma is rich in fruits, the most striking of which are pears. An excellent acidity balance gives this wine strength and structure . It is dry and smooth on the palate, and leaves a long, pleasant aftertaste. The Pinot Grigio goes well with many dishes, especially lighter foods, to which it is an excellent accompaniment. It is served chilled and also bestows a fine taste following longer ageing.

The average price per bottle is approx $16.00, which is extremely reasonable for such a great Pinot Grigio.

Print Friendly and PDF
Tags: Wine

CARIBLANCO, SAUVIGNON BLANC, CHILE 2007

January 01, 2018 in Food for Thot, Drinks

Byron Kosuge is a California-based winemaker with more than 20 vintages of experience under his belt. He specializes in Syrah and Pinot Noir. In the off-seasons of California, he heads down to Chile to consult for the Kingston Family. This is where this incredible Sauvignon Blanc was born. It’s very citrusy and floral but with a 14.5% alcohol, it remains perfectly balanced. It is a perfect accompaniment to fish, grilled chicken and cheese. Sauvignon Blanc in general is one of the few wines that goes well with Sushi. I just had it with Sushi and didn’t want it to end. I wish I had more wine and tuna, but for now, I will just write.

This bottle goes for approx $18.00 a bottle and I am sure you can find out more information by contacting Byron on his website: http://www.bkosugewines.com/

I also ended up buying a few of his Pinot Noirs, that I will be writing about shortly. Byron has mastered Pinot Noirs and gathering grapes from the Hirsh vineyard have made his wine one of the best.

Print Friendly and PDF
Tags: Wine
Prev / Next

Food for Thot

Just a boy who likes boys, cooking his little heart out. Using what my mamma gave me and drawing inspiration from growing up Italian + living all over the world.


Featured Posts

Featured
Nov 19, 2022
MOM'S FAMOUS CHEESECAKE
Nov 19, 2022
Nov 19, 2022
Nov 18, 2022
GRILLED CHEESE
Nov 18, 2022
Nov 18, 2022
Sep 7, 2022
THE TOMATO SAUCE
Sep 7, 2022
Sep 7, 2022
Jun 28, 2022
BUTTERMILK LEMON BLUEBERRY BRUNCH BREAD
Jun 28, 2022
Jun 28, 2022
Feb 27, 2022
LAVENDER SHORTBREAD COOKIES
Feb 27, 2022
Feb 27, 2022
Feb 26, 2022
El Turix (Taquería El Turix) - Mexico City
Feb 26, 2022
Feb 26, 2022
Jan 18, 2022
"GAYNOLA" - aka OLIVE OIL, MAPLE, CARDAMOM GRANOLA
Jan 18, 2022
Jan 18, 2022
Dec 13, 2021
TOMATO CONFIT
Dec 13, 2021
Dec 13, 2021
Nov 30, 2021
FLUFFY BUTTERMILK DINER STYLE PANCAKES
Nov 30, 2021
Nov 30, 2021
Nov 29, 2021
GREEK LEMON POTATOES
Nov 29, 2021
Nov 29, 2021